Giving read-only access to your Google Ads account is crucial when you need partners, auditors, or team members to review your campaign performance without the ability to make any changes. This guide will take you through the process step by step.
New Interface Update Starting July 2024
Google Ads began rolling out a new interface in July 2024. By August 2024, the rollout is expected to be complete. These instructions are for the new interface.
Step 1: Sign In to Google Ads
First, log in to your Google Ads account using the admin credentials for the account you wish to share access to.
Step 2: Go to Admin > Access and Security
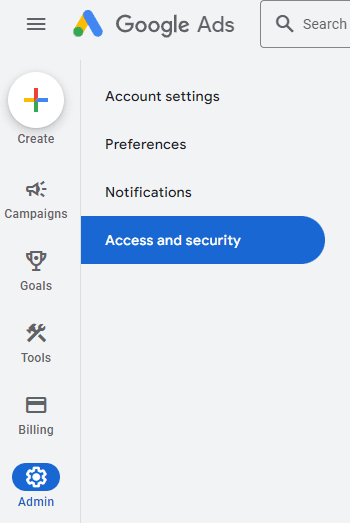
From the left menu, click on “Admin,” then select “Access and security” from the sub-menu on the left side.

Step 3: Invite the New User
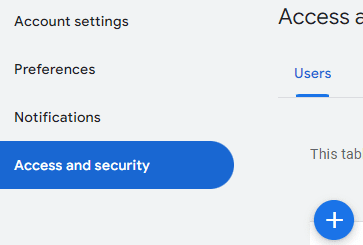
In the main window, under the Users category, click the blue, circular “+” icon to add a new user.

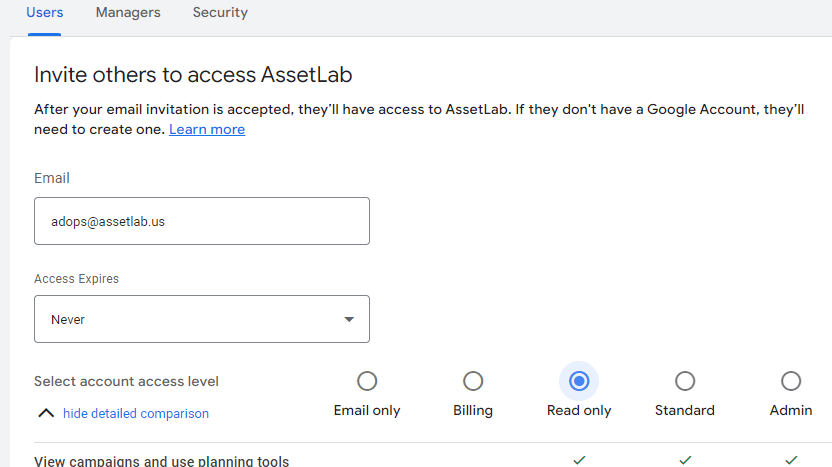
Under the “Invite others to access” section, enter the following details:
- Email Address: adops@assetlab.us
- Set Access Level: Read Only
Scroll down and click “Send Invitation.”

Step 4: We Accept the Invitation
Once the invitation is sent, we will receive it and accept the access request. With access granted, we can conduct a thorough audit of your account, identifying opportunities to save money and increase the return on investment from your advertising budget.
Step 5: Review the Audit Report Together
After completing and reviewing the audit, we will meet to discuss the most significant opportunities to optimize your ad budget, focusing on saving money and boosting returns.
Interface Prior to July 2024
Step 1: Log In to Google Ads
Start by logging into your Google Ads account. Use the admin credentials for the account you want to share read-only access to.
Step 2: Access Account Settings
After logging in, click the tools icon in the upper right corner of your Google Ads dashboard. From the drop-down menu, select “Account access” under the “Setup” column. This is where you manage user permissions.
Step 3: Add a New User
In the “Account access” section, click the blue plus button to invite new users. Enter the email address of the person you want to give access to. Use this email address: AdOps@assetlab.us
Step 4: Assign User Permissions
Next, you’ll need to set the access level for the new user. Choose “Read only” to ensure they can view your campaigns, performance data, and other account details without making changes.
Step 5: Send the Invitation
Click “Send invitation” to complete the process. The invitee will receive an email with instructions on how to accept the invitation and access your Google Ads account.
Step 6: Confirm Access
Once the invitee accepts the invitation, their status will update in the “Account access” section of your Google Ads account. You’ll see their email listed with “Read only” access.
Best Practices for Managing Access
- Regularly Review User Access: Periodically check the list of users with access to your account. Remove access for users who no longer need it to keep your account secure.
- Monitor Activity Logs: Watch the activity logs to ensure no unauthorized changes are being made.
- Clear Communication: Make sure your team members and partners understand their access level and what they can and cannot do within the account.
Getting Started With Ads
Granting read-only access to your Google Ads account is simple yet essential for maintaining control over your campaigns while allowing others to review performance data. By following these steps, you can keep your account secure and ensure that collaborators have the necessary access to fulfill their roles effectively.
If you need more help or advanced Google Ads management, contact our team at Southernmost Digital. We specialize in optimizing and managing Google Ads campaigns to deliver maximum results for your business.


