Event tracking as an advanced analytics option that allows you to see how people behave on your website. You can monitor anything from button and link clicks, form submissions, video watching etc. In this article you will find out how to set up event tracking using google tag manager and google analytics.
There are two ways to set up event tracking and get the results in Google Analytics. One is doing it manually by first setting an event as a goal inside Analytics and then setting up pieces of code on every element you want to track. The second way is to use Google Tag Manager which requires no coding skills at all.
Both methods don’t require advanced coding skills even though setting even tracking manually requires some knowledge so that you can know where to find and what to edit.
In this article we will only cover the second method which is far more intuitive and modern.
How to set up event tracking with Google Tag Manager
Even though Google Tag Manager is a fairly new Google product it is quite tricky to navigate if you don’t know what you are doing. It can become overwhelming pretty fast and it can cause frustration. However if you have no coding experience or you have never dealt with code then you should definitely give Google Tag Manager a chance.
GTM also allows for elements (triggers, variables etc.) to be reusable for other events and allows integration with different products to track ad conversions and facebook pixel events and many more. So if you have a large website then you would not find a better tool.
Step one: Enable the built-in click variables
Google Tag Manager contains great amount of built in variables that you can be used to determine which element should activate the trigger once it is fired. Select “Variables” in the sidebar and click the “Configure” button.
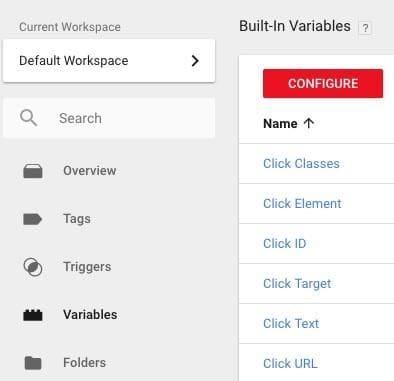
Then make sure all the click variables are checked.

Step two: Create a new tag for the event you want to track
Click “Tags” on the sidebar. Then click the “New” button. You’ll have the option to select your tag type. Choose “Universal Analytics.”
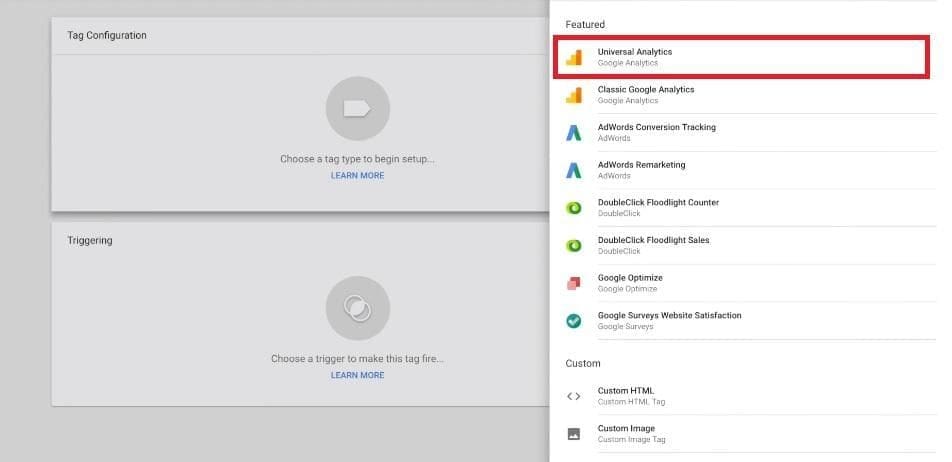
Creating a new tag in Google Tag Manager
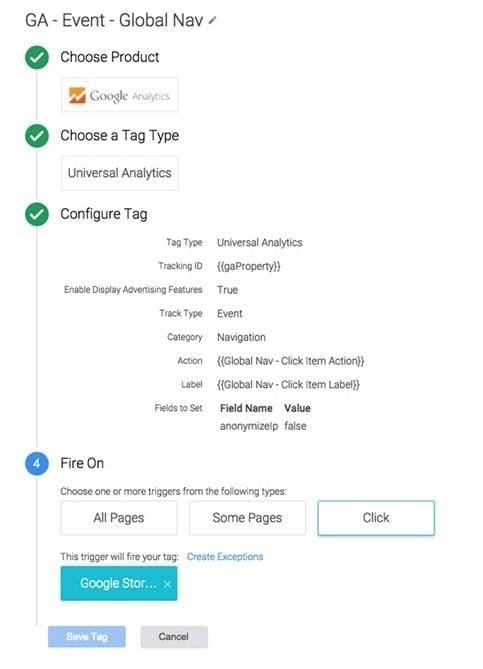
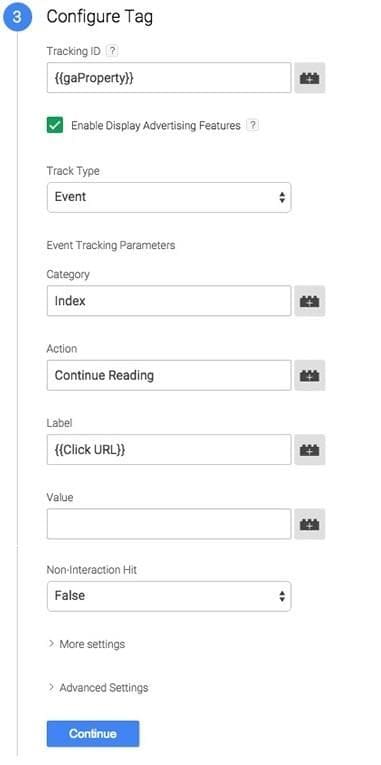
Step three: Configure your tag
Set your new tag’s track type to “Event.” Fill in all the relevant information – category, action, label, etc. – in the fields that appear underneath, and click “Continue.”
Step four: Specify your trigger
Specify the trigger that will make your tag fire – for instance, a click. If you are creating a new trigger (as opposed to using one you’ve created in the past), you will need to configure it.

Types of triggers that you can choose in Google Tag Manager
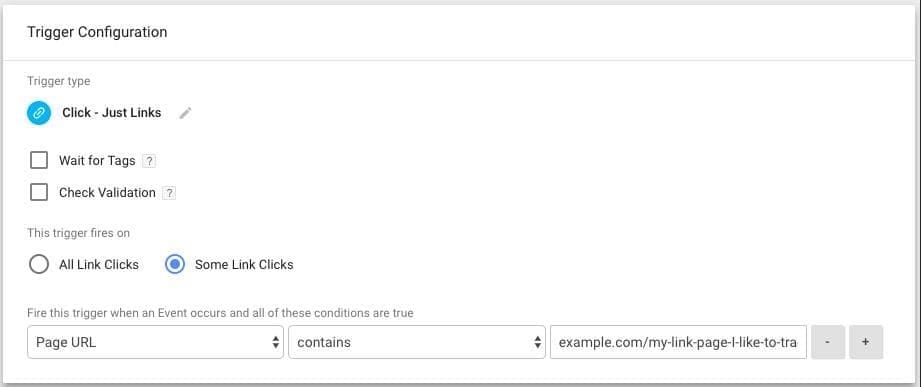
An example of how to configure a trigger. This one fires when a certain URL is clicked. Source: Johannes Mehlem
Step five: Save the finished tag
After you save your trigger, it should show up in your tag. Click “Save Tag” to complete the process.